
4 iPhone Photography Tricks
Utilizing Portrait Mode
.jpeg)
.jpeg)
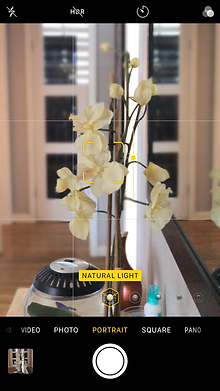
Portrait mode is a feature that is available on iPhone 8+ and higher. Portrait mode blurs the background of a subject automatically and creates a nice depth of field in your photo.
In the camera app it should appear to the right of "photo". Portrait mode blurs the background behind your subject. Using the iPhone 8+ and higher model's double camera design to determine depth. You may also be forced to move back so your phone can sense depth better.
Beware: if you are taking a picture of something furry using portrait mode. You may need to be careful of fur getting clipped in the photo.
.jpeg)
.jpeg)
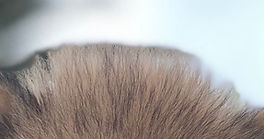
In the picture above the fur at the top of the puppies head is blurred. This is because portrait is mode having a hard time figuring out whether or not its part of the background.
To avoid this, reduce the amount of back light on your subject to help out portrait mode. You can also wait until sunset when the light is softer than at noon.
Lastly make sure there is as much space between the subject and the background as possible.
Adjust ISO

Picture too dark or too bright? There is a simple way to adjust your cameras sensitivity to light (ISO). Click on your subject and a yellow square should appear. Drag the brightness symbol up or down to adjust your ISO.
Locking Focus
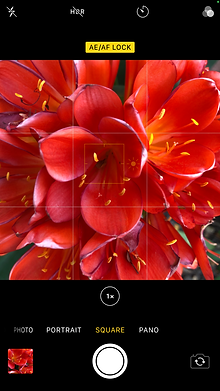

iPhone might have lower end DSLRs beat in macro photography. AE / AF lock (auto -exposure / auto-focus lock) locks your iPhone's exposure and focus to one spot. This is useful for macro photography. It can be an alternative for portrait mode for iPhone 8's and below.
This also works with portrait mode to lock your focus. However with portrait mode you have to be further away from the subject.
High Dynamic Range
.jpeg)
.jpeg)
a high dynamic range image (usually abbreviated as 'HDR') is a combination of 2 or more images exposed for different areas of the scene. In the example above I exposed for the road and then the sky. However to get two of the same composition you would need a tripod.
There is an alternative to using a tripod. You can download an app that takes two photos ; one after the other. I used the free Lightroom Mobile app.
.jpeg)
.jpeg)

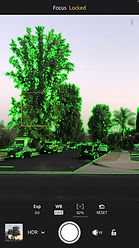
Once you have made an account on Lightroom Mobile. Click on the camera icon in the bottom right corner.
This will take you to the Lightroom in-app camera.
Once you are in camera make sure to set it to HDR (bottom left) and once you have your scene ready. Hold down somewhere to focus your camera there. Since this is a wider shot, focus doesn't really have any effect. For close-up pictures, this will matter.
Even though Lightroom is built for handheld use, a tripod will assure that you don't end up with a blurry mess. If you are doing handheld get in a comfortable position with the camera before snapping the HDR.
Once you're done taking your HDR it will appear in your Lightroom Album where you can easily export it to your photos.
Lastly, the difference between a HDR and simply increasing exposure. The key difference is that increasing the exposure for one section of your image, may wash out another part that is already perfectly exposed. However a HDR will not wash out any colors.
High Dynamic Range
Post Process Exposure
.jpeg)
Notice how the sky in the post process exposure is washed out. While the HDR retains accurate sky colors. This is best used for landscape photography. Unfortunately the only landscape I have in my neighborhood to demonstrate is a giant tree.
Conclusion
Your iPhone is a surprisingly powerful photography tool. In my portfolio there are actually a few photos that I took with my iPhone 8+. Such as my Moscow Red Square picture. Then edited in Darktable which I also have tutorials on; (Darktable Guide) & (Color Grading).
"You dont need the best gear to be ansel adams, you just need to be ansel adams"
- Unknown